This post combines several different sources of information on installing Let’s Encrypt on Debian/Ubuntu and configuring SSL on nginx and will show how to install Let’s Encrypt on Ubuntu with nginx already installed. As of writing there is no automated install process provided by Let’s Encrypt for nginx.
For more detailed information see the sources at the end of this post.
Before You Begin
- Make sure the server has at least 2GB of RAM. If not, add or increase your swap size to meet this requirement, otherwise problems may occur during install as reported here and here.
- Update the server software packages:
1 |
sudo apt-get update && sudo apt-get upgrade |
Clone and Install Let’s Encrypt
- If git is not installed then execute the following command:
1 |
sudo apt-get install git |
- Clone the Let’s Encrypt GitHub repository to /opt/letsencrypt:
1 |
sudo git clone https://github.com/letsencrypt/letsencrypt /opt/letsencrypt |
Generate an SSL Certificate
- Navigate to /opt/letsencrypt:
1 |
cd /opt/letsencrypt |
- Run Let’s Encrypt with the --standalone parameter. For multiple domains add -d example.com:
1 |
sudo -H ./letsencrypt-auto certonly --standalone -d example.com -d www.example.com |
1
2
3
|
sudo -H
Request that the security policy set the HOME environment variable to the home directory specified by the target
user's password database entry. Depending on the policy, this may be the default behavior.
|
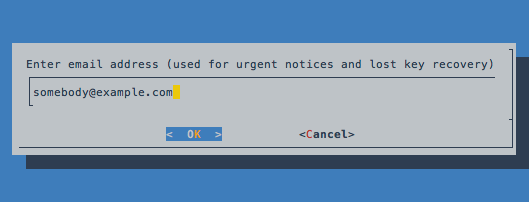
- Next enter an administrative email address and follow the prompts:
- Agree to the Terms of Service:

- If no problems occur then a similar message will show below:
1
2
3
4
5
6
7
8
9
10
11
12
13
14
15
16
|
IMPORTANT NOTES:
- If you lose your account credentials, you can recover them through
e-mails sent to somebody@example.com.
- Congratulations! Your certificate and chain have been saved at
/etc/letsencrypt/live/example.com/fullchain.pem. Your
cert will expire on 2016-03-31. To obtain a new version of the
certificate in the future, simply run Let's Encrypt again.
- Your account credentials have been saved in your Let's Encrypt
configuration directory at /etc/letsencrypt. You should make a
secure backup of this folder now. This configuration directory will
also contain certificates and private keys obtained by Let's
Encrypt, so making regular backups of this folder is ideal.
- If you like Let's Encrypt, please consider supporting our work by:
Donating to ISRG / Let's Encrypt: https://letsencrypt.org/donate
Donating to EFF: https://eff.org/donate-le
|
- The files that will be used in nginx for the certificate are located at /etc/letsencrypt/live/example.com. The two files that are need are fullchain.pem and privkey.pem.
Generate Strong Diffie-Hellman Group
- To increase security, generate a strong Diffie-Hellman group. To generate a 2048-bit group, use this command:
1 |
sudo openssl dhparam -out /etc/ssl/certs/dhparam.pem 2048 |
- This will take a while to generate.
Configure SSL in Nginx
- Edit the nginx configuration that contains your server block. The default one is located at /etc/nginx/sites-available/default, for the purpose this post we will edit this one:
1 |
sudo nano /etc/nginx/sites-available/default |
- Now locate the following lines and comment out or remove them in your server block:
1
2
|
listen 80 default_server;
listen [::]:80 default_server ipv6only=on;
|
- The following is an example configuration:
1
2
3
4
5
6
7
8
9
10
11
12
13
14
15
16
17
18
19
20
21
22
23
24
25
26
|
# http-redirects to https
server {
listen 80 default_server;
server_name secure.example.com;
return 301 https://$host$request_uri;
}
# standalone HTTPS-server
server {
listen 443 ssl;
server_name secure.example.com;
ssl_certificate /etc/letsencrypt/live/example.com/fullchain.pem;
ssl_certificate_key /etc/letsencrypt/live/example.com/privkey.pem;
ssl_protocols TLSv1 TLSv1.1 TLSv1.2;
ssl_prefer_server_ciphers on;
ssl_dhparam /etc/ssl/certs/dhparam.pem;
ssl_ciphers 'ECDHE-RSA-AES128-GCM-SHA256:ECDHE-ECDSA-AES128-GCM-SHA256:ECDHE-RSA-AES256-GCM-SHA384:ECDHE-ECDSA-AES256-GCM-SHA384:DHE-RSA-AES128-GCM-SHA256:DHE-DSS-AES128-GCM-SHA256:kEDH+AESGCM:ECDHE-RSA-AES128-SHA256:ECDHE-ECDSA-AES128-SHA256:ECDHE-RSA-AES128-SHA:ECDHE-ECDSA-AES128-SHA:ECDHE-RSA-AES256-SHA384:ECDHE-ECDSA-AES256-SHA384:ECDHE-RSA-AES256-SHA:ECDHE-ECDSA-AES256-SHA:DHE-RSA-AES128-SHA256:DHE-RSA-AES128-SHA:DHE-DSS-AES128-SHA256:DHE-RSA-AES256-SHA256:DHE-DSS-AES256-SHA:DHE-RSA-AES256-SHA:AES128-GCM-SHA256:AES256-GCM-SHA384:AES128-SHA256:AES256-SHA256:AES128-SHA:AES256-SHA:AES:CAMELLIA:DES-CBC3-SHA:!aNULL:!eNULL:!EXPORT:!DES:!RC4:!MD5:!PSK:!aECDH:!EDH-DSS-DES-CBC3-SHA:!EDH-RSA-DES-CBC3-SHA:!KRB5-DES-CBC3-SHA';
ssl_session_timeout 1d;
ssl_session_cache shared:SSL:50m;
ssl_stapling on;
ssl_stapling_verify on;
add_header Strict-Transport-Security max-age=15768000;
...
}
|
OCSP Stapling for Let’s Encrypt Certificate with Nginx
- Determine which of the Let’s Encrypt certificates was used to sign your certificate:
1 |
openssl x509 -noout -text -in /etc/letsencrypt/live/example.com/fullchain.pem | grep Issuer: |
- The output will be similar to the following:
1 |
Issuer: C=US, O=Let's Encrypt, CN=Let's Encrypt Authority X3 |
- That last part, Let's Encrypt Authority X3, is the name of the Let’s Encrypt certificate that was used to sign the certificate.
- Download the PEM version of this certificate. All of the Let’s Encrypt intermediate certificates are on the Let’s Encrypt site; click on the “PEM” link for the appropriate certificate to get the file you need. Or, from the command line,
1 |
sudo wget -O /etc/ssl/certs/lets-encrypt-x3-cross-signed.pem "https://letsencrypt.org/certs/lets-encrypt-x3-cross-signed.pem" |
- Replace “x3” with a different certificate name if necessary.
- Edit the nginx configuration from before and add:
1
2
3
|
ssl_stapling on;
ssl_stapling_verify on;
ssl_trusted_certificate /etc/ssl/certs/lets-encrypt-x3-cross-signed.pem;
|
Apply the Changes
- Test the nginx configuration:
1 |
[sudo] nginx -t |
- Reload nginx to put the changes into effect:
1 |
sudo service nginx reload |
Test the SSL Certificate
- Check with the DigiCert SSL Installation Diagnostic Tool at: https://www.digicert.com/help/
- Check with Qualys SSL Labs Report to see how your server configuration scores at: https://www.ssllabs.com/ssltest/analyze.html (should result in a A+ rating, it will show “OCSP stapling: No” here is the explaination of why)
- By command line:
1 |
openssl.exe s_client -connect [yoursite.com]:443 -status |
- If OCSP stapling is enabled, in the OCSP Response Data section, it should say the following:
1 |
OCSP Response Status: successful (0x0) |
Renewing SSL Certificates
Go to:
1 |
cd /opt/letsencrypt |
Then enter:
1 |
sudo -H ./letsencrypt-auto certonly --standalone --renew-by-default -d example.com -d www.example.com |
It will show a similar message below, certificates have a 90-day lifespan before they expire:
1
2
3
4
5
6
7
8
9
|
IMPORTANT NOTES:
- Congratulations! Your certificate and chain have been saved at
/etc/letsencrypt/live/example.com/fullchain.pem. Your
cert will expire on 2016-03-31. To obtain a new version of the
certificate in the future, simply run Let's Encrypt again.
- If you like Let's Encrypt, please consider supporting our work by:
Donating to ISRG / Let's Encrypt: https://letsencrypt.org/donate
Donating to EFF: https://eff.org/donate-le
|
Sources:
Install Let’s Encrypt to Create SSL Certificates
How To Secure Nginx with Let’s Encrypt on Ubuntu 14.04
Setting up OCSP stapling for Let’s Encrypt certificates under nginx