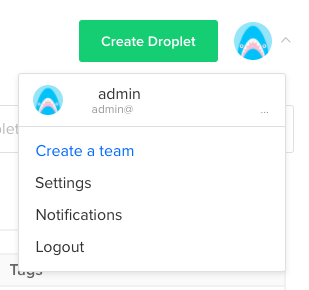
To get to the Settings in your DigitalOcean account, you click on the top right icon to the right of the Create Droplet button. From the drop down you will find the Settings link.
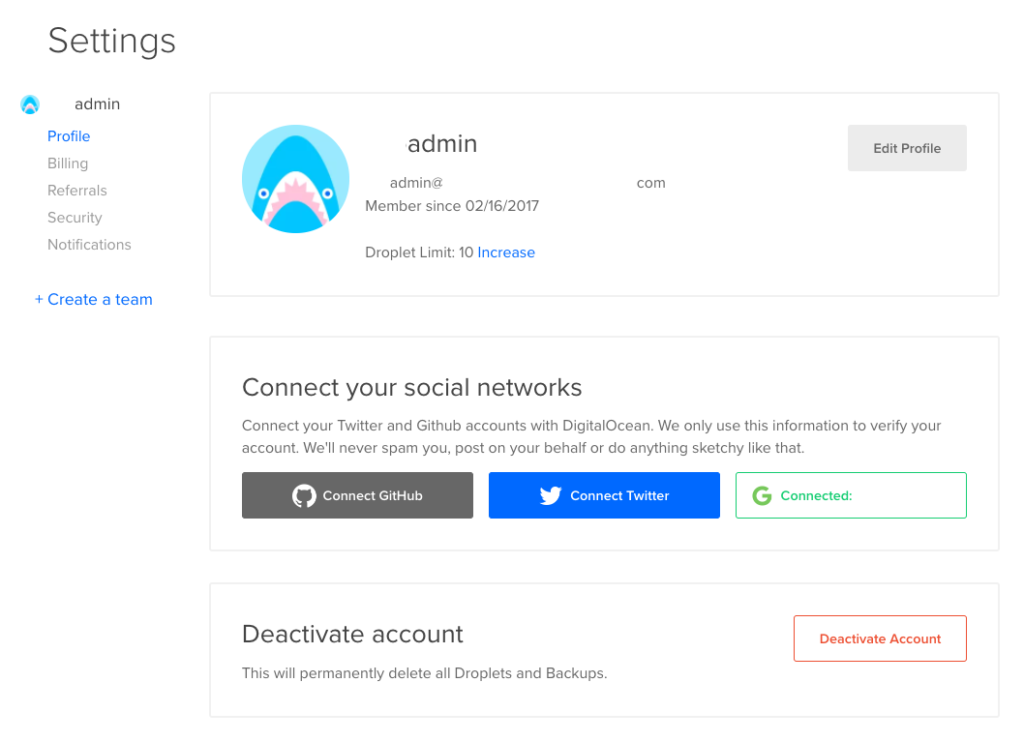
On the Settings page you can edit your profile, connect your social networks, and deactivate you account. The initial amount of Droplets you can create per account is 10 but you can increase it if needed. DigitalOcean will use the social networks, GitHub, Twitter, or Google account, to verify your account which you can connect them.
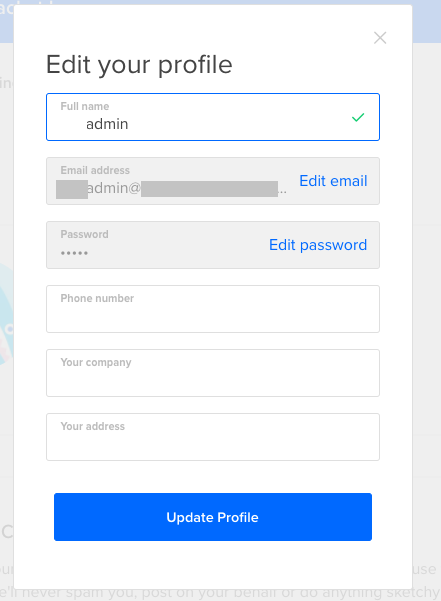
When you click on Edit Profile, you can edit your full name, email address, password, add a phone number, company name, and address.
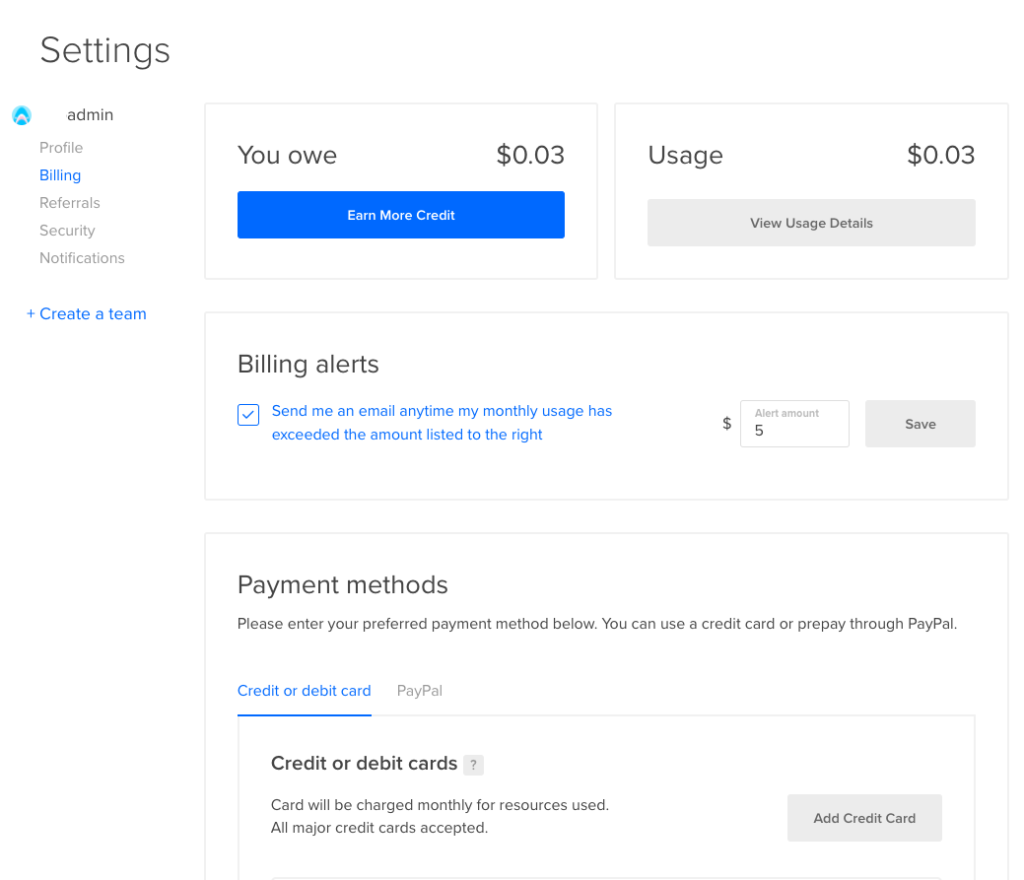
After you are finish editing your Profile, look at the Billing options. Here you can see how much you owe, usage, change when DigitalOcean will alert you when your usage has exceeded a predetermined amount, and adjust your payment methods. For payment methods, DigitalOcean accepts credit or debit cards and PayPal. In the screenshot below I changed the billing alerts to $5.
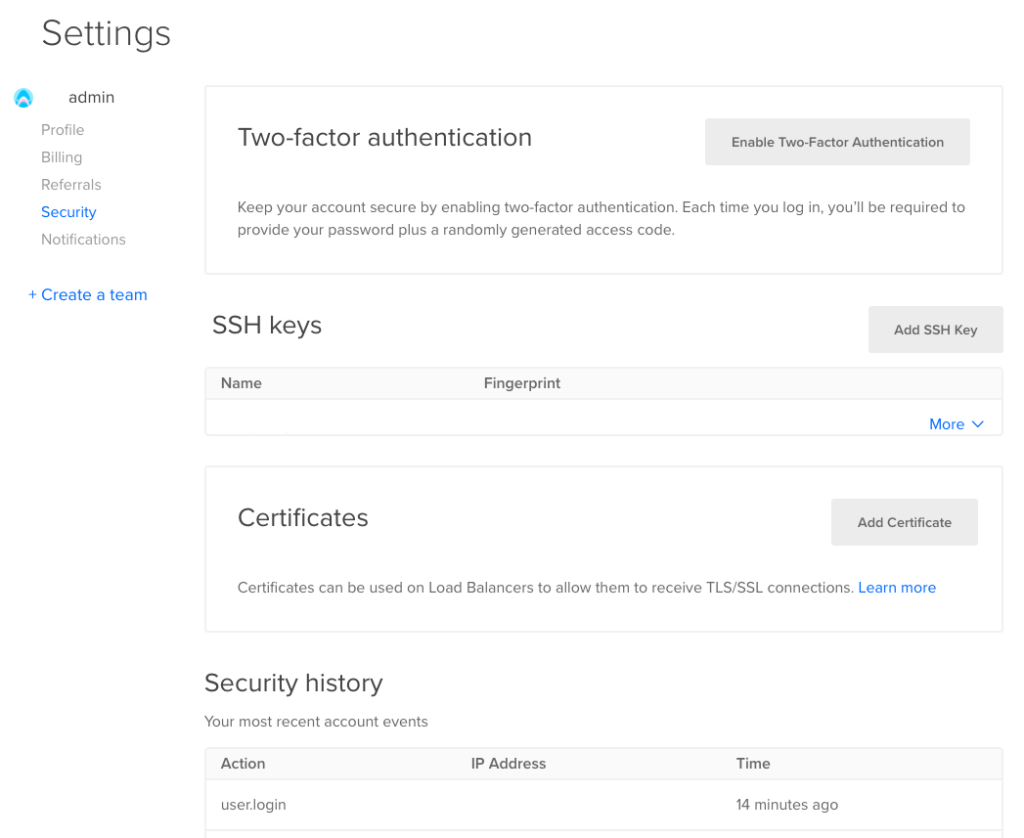
Under Security, you can setup two-factor authentication, SSH keys, add certificates for Load Balancers, and see recent account events.
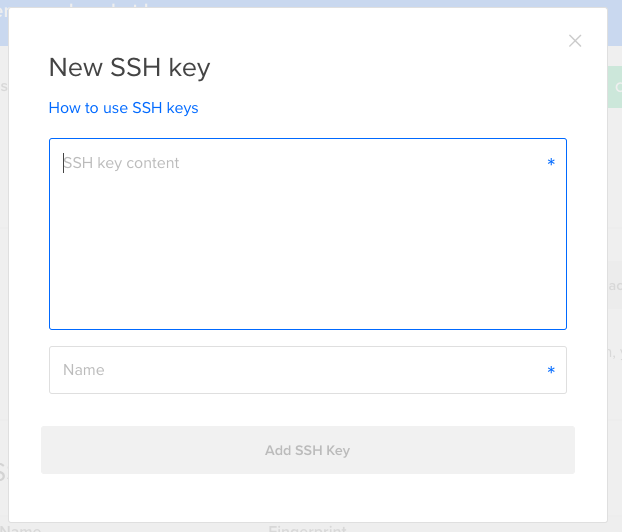
When you click on the Add SSH Key button you are presented with the follow field to paste in your public SSH key and to provide a name for it.
Check out the other related posts Your First Droplet on DigitalOcean and Networking.